How to Hang Pictures at Home: A Step-by-Step Guide
Share
Hanging pictures at home can seem like a simple task, but when done right, it can truly elevate the look of a room, creating a more polished and cohesive aesthetic. Whether you’re decorating a blank wall or adding a personal touch to a gallery wall, knowing how to hang pictures properly is essential for achieving a balanced, visually appealing result.
If you’ve ever found yourself unsure about whether your pictures are hung too high, too low, or crooked, don’t worry! This guide will take you through the basics of hanging pictures, from choosing the right tools to perfecting the placement.
1. Gather Your Tools and Materials
Before you start hammering nails into the wall, make sure you have everything you need:
- Measuring tape or ruler
- Pencil (preferably light-coloured, so you can easily erase any marks)
- Level (a small, handheld level is ideal)
- Hammer
- Picture hangers or nails (depending on the weight of the picture)
- String or wire (if the picture frame requires it)
- Wall anchors (for heavier pictures or drywall)
- Gallery hooks (if you're creating a gallery wall)
2. Decide on Placement
The first step to hanging a picture is deciding where it will go on the wall. This is crucial for creating a balanced and harmonious look.
Consider the Room’s Layout:
- In the living room or bedroom, artwork should typically be placed at eye level, around 57–60 inches from the floor to the centre of the picture.
- In a hallway or gallery wall, you may want to adjust the height to suit the space (e.g., for narrow spaces, you can place pictures slightly higher to avoid overcrowding).
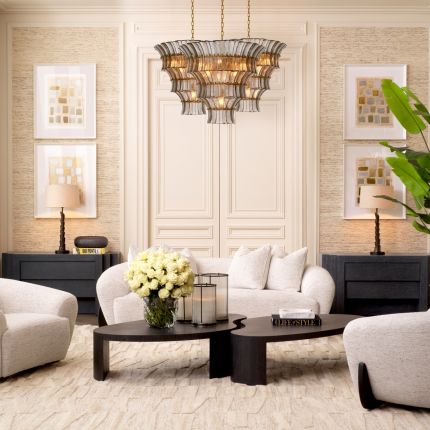
- Above furniture: When hanging pictures above a sofa, console table, or sideboard, aim for the picture to be roughly 6–8 inches above the furniture.
Visual Balance:
- Take into account the size of the picture relative to the space. A single large piece works well as a focal point, while smaller frames work best in clusters or galleries.
- If you’re hanging several pictures together, create a grid or arrange them in a balanced, harmonious way, ensuring the gaps between each piece are consistent (typically around 2–4 inches).
3. Measure and Mark the Wall
Proper measurement ensures that your picture hangs straight and at the right height.
- Mark the centrre of the wall or space where the picture will hang. Use a measuring tape to find the middle point of the wall, and then make a small pencil mark.
- Measure the picture’s wire or hanging hardware: For frames with hanging wire, measure the distance from the top of the frame to the highest point the wire will reach when pulled tight. For frames with D-rings or sawtooth hangers, measure the distance between the hangers and the top of the frame.
Once you have these measurements, calculate where the hardware will need to be positioned on the wall.
4. Use a Level and Mark Placement
After you’ve decided where the picture will go and have measured the correct hanging position, use a level to ensure the picture is perfectly straight.
- Mark the position of the picture's hanging hardware (whether it's the wire, D-rings, or a sawtooth hanger) on the wall with a pencil.
- For wire-hung frames, make sure the pencil mark is at the height where the wire will reach when pulled taut.
- For D-rings or sawtooth hangers, mark where each of the hardware pieces will need to be placed.
Use your level to double-check that your marks are level horizontally. This ensures that the picture won’t end up tilted once hung.
5. Install the Hangers or Nails
Now it’s time to put the hardware into the wall. The type of wall you’re working with will determine what kind of hardware you need:
- For lightweight pictures (up to 10–15 pounds), you can use standard picture nails or small nails.
- For medium-weight pictures (15–30 pounds), use picture hangers with nails or command strips for a no-damage option.
- For heavy pictures (over 30 pounds), you’ll need wall anchors, screws, or toggle bolts to secure the weight safely into the wall. If you're hanging on drywall, be sure to locate the studs using a stud finder to ensure a secure hold.
6. Hang the Picture
Once your picture hangers are installed, it's time to hang your art:
- Wire-hung pictures: If your picture has a wire, hang the wire over the nails or picture hangers, ensuring it’s centred and level.
- D-rings or Sawtooth Hangers: For pictures with D-rings or sawtooth hangers, simply hang the frame directly on the nails or hooks you've installed in the wall.
For gallery walls, you can hang multiple pieces at once, but make sure to double-check their alignment with a level to ensure the frames stay straight.
7. Fine-Tune the Positioning
After hanging the picture, step back and take a look at the overall placement. Is it centred? Is it at the right height? You might need to make slight adjustments.
- Use a level to double-check that everything is aligned properly. Even a small tilt can be noticeable.
- If the picture doesn’t sit flush against the wall, you may need to reposition the nails or picture hangers to achieve a secure fit.
8. Enjoy Your Art
Once your picture is hung and level, step back and admire your work! Hanging art is a simple but impactful way to add personality and style to any room. Whether it's a single large statement piece or a carefully curated gallery wall, your space will instantly feel more complete and inviting.
Additional Tips:
- Gallery Walls: When creating a gallery wall, start by laying out your pictures on the floor first to find a good arrangement before hanging them.
- Height Consideration: If you're hanging pictures in a space that people will be sitting in (like a living room), aim for a height where it’s easy to appreciate the art while seated.
- Mix Frame Styles: Don’t be afraid to mix and match different frame styles and sizes. The variation can create a more interesting and eclectic display.
By following these steps, you’ll ensure that your pictures are hung beautifully and securely, creating a polished and professional look in your home. Happy decorating